Showing posts with label Gift Bag. Show all posts

Thursday, December 12, 2024

Gift Bag

There's a beautiful Mood Board for Inkspirational.  The little town in the bottom right corner caught my attention.  
My friend, Susanne, made a card a year ago that I loved using a retired Poppystamps village die.  She's one of my many sweet friends who offer to send me diecuts when I admire their cards.  Here's what I did with one of them.  
I painted soft gold scraps to go behind the windows, covered the houses with a shimmer pen and added Distress Snowfall Grit Paste to the roofs and the torn white cardstock strip.  The little trees from SSS Village die set were cut from green scraps and covered with Peeled Paint Distress Stickles.  I cut the little stars from Simply Graphic Starry Arches--trimming them off the arch.  The snow on the black panel was done with a Posca white paint marker.  I've lost track of how many times I've used the little sentiment from an old Winnie and Walter set.  This time it's white embossed.  Hard to get decent pictures, but hopefully you get an idea of what I did.
I saved the beautiful black gift bag the jeweler put my new watch in earlier this year.  Think my little scene dresses it up perfectly for the holidays.  I'm also entering Poppystamps, Snippets Playground (stars, trees & torn strip are from scraps), SSS Monday and SSS Wednesday.
Thanks so much for taking time to stop by.  If your blog address is in your profile or comment, I will visit you.  I'm behind on mailing Christmas cards, so may be a little while.  


Wednesday, December 5, 2018

Create it Wednesday~Gift Bag

It's my day on the Precious Remembrance Shop Blog & I've taken a break from holiday cards to make a fun decorated gift bag.  Mine is for an anniversary, but it could also work for a birthday or Valentine's Day--just change the sentiment.

The PRS flat white paper bag was stamped all over in Delicata Silvery Shimmer with the cute block of hearts from PRS Everyday Stamp set.  The 3 strips were stamped with images from PRS Love Coupon Stamp set and the bottom edges were die cut with a wavy MFT border die.  I folded over the top of the bag & punched 6 small holes to tie on the black & white twine.  The sentiment from PRS Everyday Stamp set was white embossed on the black Poppystamps die cut tag & attached with a little red clothespin from my stash.  Now I better get back to Christmas cards!  I'm entering SSS Monday (B is for bag), SSS Wednesday & WAW.
Grab our badge:
Thanks so much for taking time to stop by.  If your blog address is in your profile or comment, I will visit you.


Wednesday, October 10, 2018

Create It Wednesday~Happy Halloween

I'm up on the PRS Blog today with a cute little Halloween gift bag.  The scalloped circle by Verve was a prize I won just before Julee closed her company.  It was perfect for this project!


All the stamps are from the adorable Beware stamp set that is currently on sale for just $7.99.  Hope you'll check out my post.

I'm entering Double D, Snippets Playground, SSS WednesdayDie Cut Divas.
Snippets Playground BadgeGrab our Badge

Thanks so much for taking time to stop by.  If your blog address is in your profile or comment, I will visit you.


Wednesday, July 11, 2018

A Little Something

It's my day on the Precious Remembrance Shop Blog.  I made a summery tag & gift bag using PRS Little Things & Coffee Love
First I stamped the fun circles multiple times in VersaMagic Persimmon & Pink Grapefruit.  Luckily, I still have my punches which made it very easy to cut them all out.  I attached 5 across the bottom of the Plain White Flat Paper Bag.  Next I made a double tag using Poppystamps Tunnel Tags.  The smaller one was dry embossed with a polka dot folder & I swiped the edges of the larger one with the Persimmon ink pad.  3 circles were attached at the bottom & a grosgrain bow at the top. 
The sentiment from Coffee Love was stamped in Brilliance Pearlescent Chocolate onto a scrap of white cardstock.  I used Washi tape as a mask so I could add Pink Grapefruit ink to the top & bottom edges before attaching it to the tag with foam tape.  Hope I've given you some inspiration for your next packaging project.  Be sure to check out all the great products in the PRS Shop and keep up with PRS on social media.
I'm entering Die Cut Divas & WAW & Poppystamps.  Thanks so much for taking time to stop by.
I'm a Diecut Diva TooGrab our badge:07-18 copy

Wednesday, April 11, 2018

Create It Wednesday~Gift For You

I'm up on the Precious Remembrance Shop Blog today with a simple packaging project.  Lots of gift giving occasions coming up including Mother's Day & graduation, but it's also fun to surprise someone when they least expect it. 
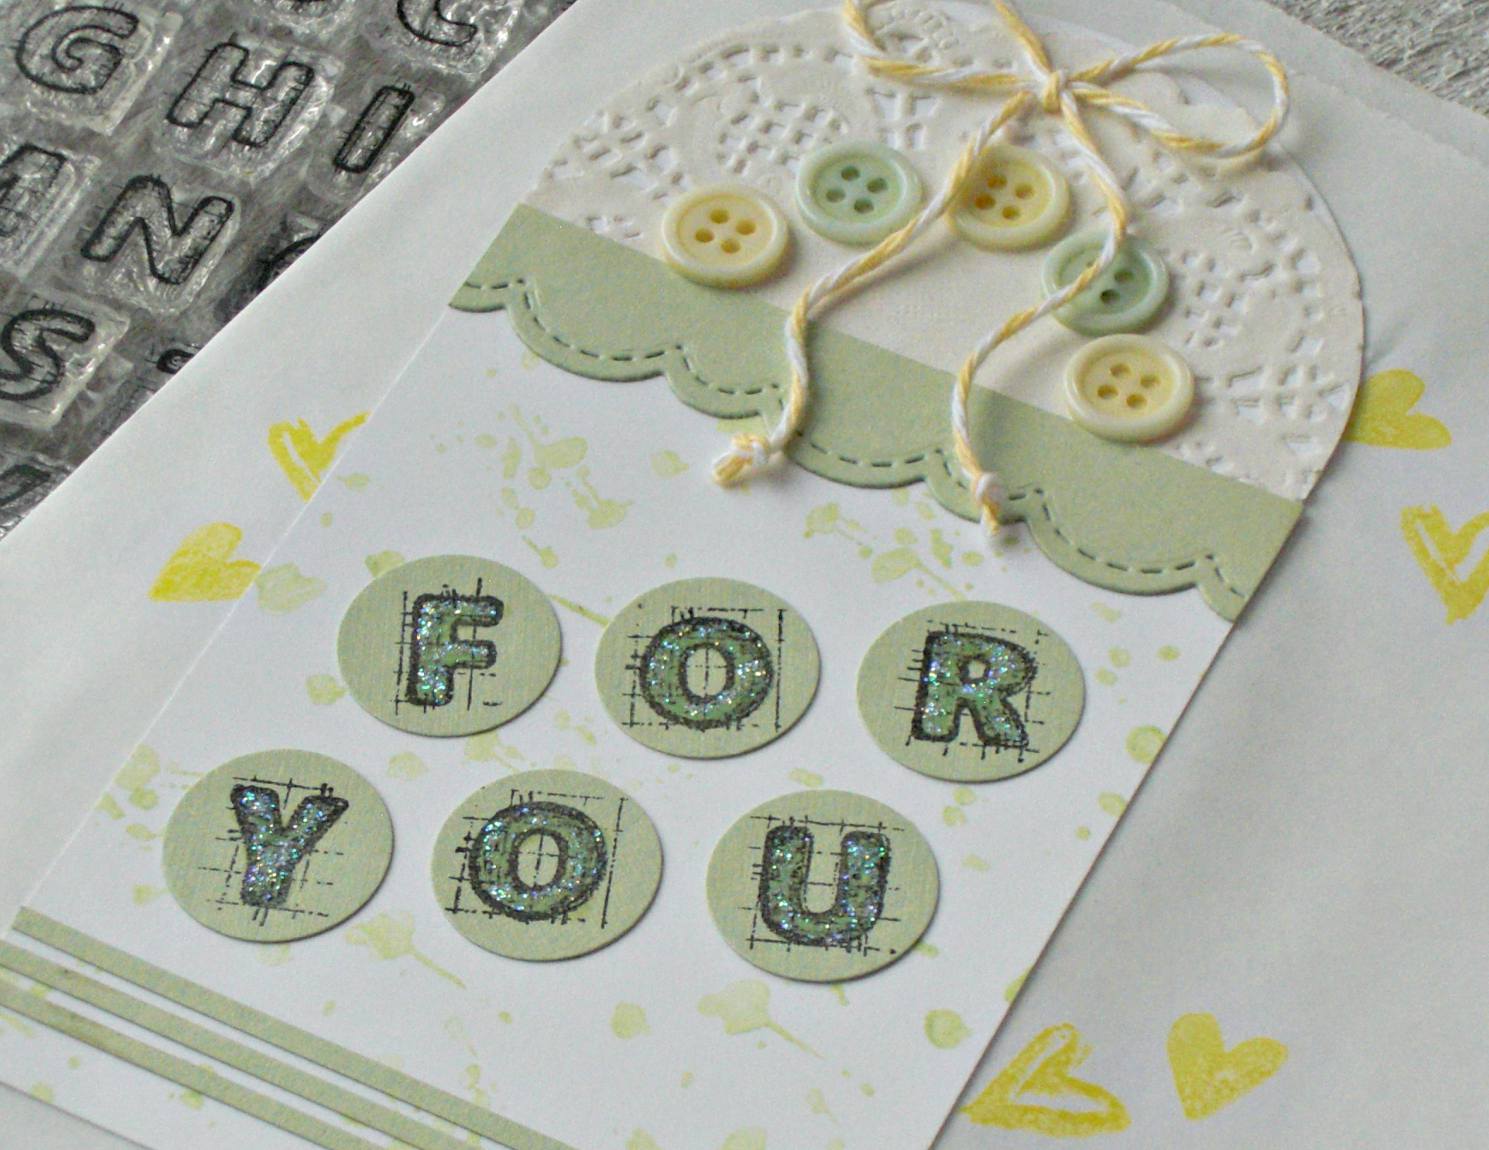
I began by making a tag using the partial die cutting technique with a circle die to fit a Mini White Doily.  After Attaching the doily, I stamped the rest of my tag with the splatters from the Positive Thoughts stamp set using a Memento New Sprout marker.  A scrap of light green cardstock was die cut with a PPP Borders 3 die & I attached it to cover where the doily was cut in half.  It was easy to add the yellow & green hand dyed buttons using strong liquid glue.  I stamped the letters I needed from the Sketchy Alphabet stamp set onto more of the cardstock using black ink.  Thankfully I still have a bunch of punches, including a circle one that was just the right size for the letters.  I colored them with the green marker & added Stickles for some fun sparkle. 
There was enough of the cardstock to cut 3 thin strips for the bottom of the tag and I finished off with a twine bow.  Before attaching the tag, I stamped a few solid  & open hearts from the Love Coupon and Happy Art stamp sets.  There are lots of great products in the PRS Store & I hope you'll check them out.  
You can keep up with products and happenings by following PRS on Facebook,PinterestInstagram & Youtube.
Thanks so much for taking time to stop by.

Wednesday, February 28, 2018

PRS Create it Wednesday~Gift Bag

It's my day on the Precious Remembrance Shop blog & my project this time is a gift bag.  The shop sells kraft & white bags along with other great products like beautiful hand dyed buttons.  I started by making a double tag.  Several of the encouraging sentiments in the Daily Thoughts stamp set were lined up on an acrylic block & stamped repeatedly in brown ink on a white die cut rectangle.  At the bottom I overstamped two leaves from the DIY stamp set in Brilliance Pearlescent Olive ink & added a little wooden star. 


The tag was attached at an angle to a vellum die cut rectangle.  I used a brown twine bow & a little white clothespin to add the tag at the top of the bag.


Little star clusters from Daily Thoughts were stamped randomly in kraft ink around the tag.  Now it's ready to fill with treats, a paperback book or maybe a stamp set.  Hope you've enjoyed seeing my stamping project that isn't a card.

To stay updated with all the PRS projects, join us on Facebook, Pinterest, Instagram & Youtube.   

Edited to add:  Entering Anything Goes at SSS Wednesday.

Saturday, February 9, 2013

Gift Bag to Enjoy

Flower Parcel Tape
Credit: Pinterest
With so many challenges  out there I've been feeling overwhelmed trying to decide what ones I want to do. But it's never a question when there's a PTI challenge since I have such a huge wishlist!  Today's 6th anniversary contest is to create a wrap, tag or gift packaging inspired by a photo on Pinterest or another site.  With time short I just checked out Nichole's "Special Delivery" board & found this wonderful kraft, brown & white package.  Immediately I thought of my Background Basics: Medallions stamp set I just used for the last card.  Since I have lots of kraft bags saved from when a stamp store used to put purchases in them, I decided to make use of one.  My tag qualifies for this week's MIM Diecut Double-Up--yah, 2 for 1!  PTI announced today that they're going to carry Zing ep, which I love & have quite a few colors already, including the Chestnut I used today.  The medallions were pretty easy to line up so I could get the length strips I needed.  I've really gotten into felt flowers so I grabbed my brown & white felt & die cut a Spellbinders Blossom Three & the PTI Snowflake Flurries.  The layers are glued together with fabric glue & a button tied with dark & light twine embellishes the center.  For the tag I did the Double-Up with Spellbinders Reverse Wonky Rectangles & the tree from Trendy Tree Tops.  I didn't layer it because I wanted the kraft bag to show through.  The sentiment is from Lovely Layers.  I had such fun putting this together & I'm really happy with the finished product--can't wait for an occasion to use it!  Hope your weekend is going well. My thoughts are with those of you digging out from the East Coast blizzard--we're not complaining about our rain!  Thanks for taking time to check out my blog.